
All About Coins
Angela, an AMS-certified infant and toddler teacher who currently blogs about her Montessori experience as an at-home educator, recently reviewed our coin materials on her blog, MOMtessori Life. Learn more about this fabulous mom at momtessorilife.com.
The following blog post was originally published on MOMtessori Life. We're excited to share this inspiration for using our coin materials in your home and classroom.
Montessori Money Unit: All About Coins
As my girls get older, they’re becoming more and more interested in money — they see me paying with it and they’re noticing the correlation between handing over some money and receiving something in return. My 5-year-old in particular is interested in using her own money to pay for things, so we’ve been working on understanding how to know if you have enough money to cover the cost of things. I decided to begin with these gorgeous coin printables by Montessori 123! The coins pictured are so clear and lifelike that they look better than the real coins we had to work with!
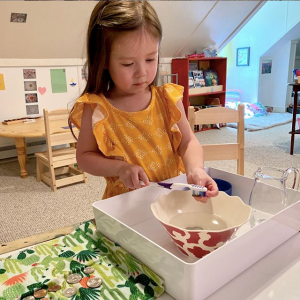
While I was busy printing out the new materials, I set the girls to work with a coin washing tray so we would have some bright and shiny coins to use with the printable cards and charts. After doing some research on it, I discovered that the “best” way to clean coins is apparently highly contested — so we went with the simplest version. I put a tray together with some dish soap, a water pitcher, some dirty coins, and a soft-bristled toothbrush. The girls first squirt a bit of soap into the bowl, then add water and dump the coins in. They pick up each one and scrub it with the toothbrush before putting it on a cloth to dry.
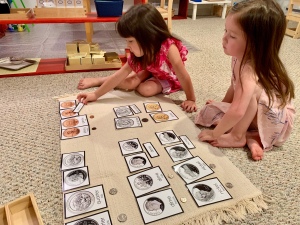
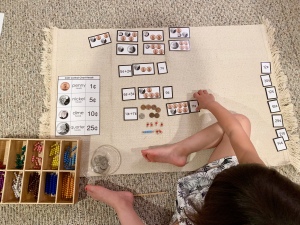
Once we had plenty of shiny coins, we began by learning the name of each and matching both heads and tails versions of the coins using a combination of the Coin Nomenclature 3-Part Cards with Working Charts materials and the Coin Equivalency 3-Part Cards with Working Charts materials. Before we did this, the girls were calling pretty much every coin a penny! Using our real coins along with the 3-part cards, we examined the differences in color, size, and even the edges of the coins to help distinguish between them.
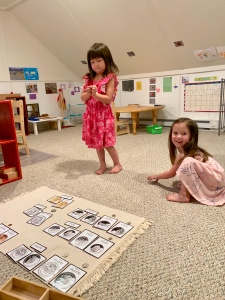
Our discussion of heads and tails brought up the concept of flipping a coin, so we practiced with that for a bit!
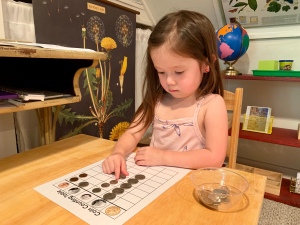
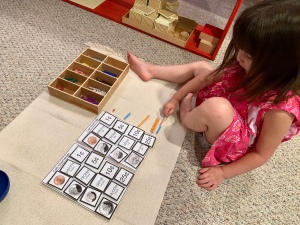
My 3-year-old is especially loving the Coin Counting Chart (found in the Counting Coins materials) — she chooses this work almost every day and busily fills in the squares with whichever coins have been newly cleaned. This could also be used as a multiplication work for older children, as you could count the coins in each column and multiply that number by their value to find out how many cents you have.
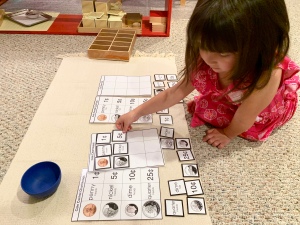
My 5-year-old is more interested in working with the value of each of the coins. I first presented the idea of cents and how much each coin was worth using the working coin charts found in the Coin Nomenclature 3-Part Cards with Working Charts materials. I added velcro dots to the working chart and the backs of the cards that fit on it so they don’t move around too much, and Lila loved using the control chart to make her own.
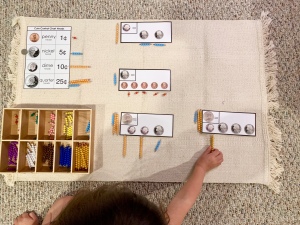
Once she had mastered the charts, we added bead bars to make the value of the coins more concrete [I recommend having something countable to use for this, even if it’s just regular math counters, until your child is a bit older]. Lila built each of the values with the bead bars and then counted to make sure it matched the written number.
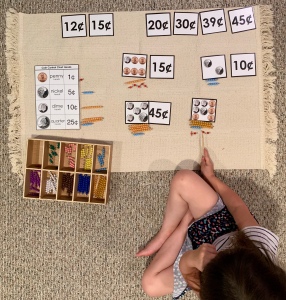
Then came the real fun — figuring out how many cents different combinations of coins would make! These cards are part of the Counting Coins materials, and we used the coin chart from the Coin Nomenclature 3-Part Cards with Working Charts materials to help remember the value of each coin. We again brought out the bead bars to use to count how many cents each coin was worth, then we counted them all together and matched the card with the value to the card with the coins!
Next we brought out the coin addition equations from the Counting Coins materials. First we chose an equation, then we figured out which picture of coins represented that equation.
We again converted the coins to bead bars as it was still a bit too abstract for Lila, then we counted them to find the sum!
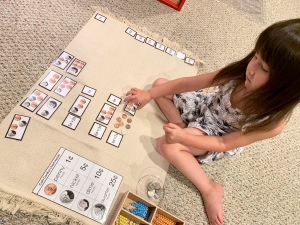
That lesson led quite naturally to one on equivalency, and I feel like this one could have easily gone before the addition one (although it works quite well after, also). We used the equivalency charts from the Coin Equivalency 3-Part Cards with Working Charts materials and built each side of the chart with bead bars before counting them to make sure they were equal.

Lila then used the working equivalency chart to create her own equivalency! She determined that 1 quarter = 5 pennies + 4 nickels!
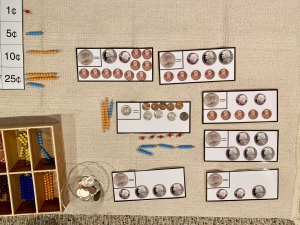
Finally, we compared Lila’s equivalency to some of the other quarter equivalency charts from the Coin Equivalency 3-Part Cards with Working Charts materials to see even more ways to make 25 cents. I could see the wheels turning in Lila’s head!
Leave a comment